SwiftUI - Multiple Buttons in a List row
You need to use BorderlessButtonStyle() or PlainButtonStyle().
    List([1, 2, 3], id: \.self) { row in
        HStack {
            Button(action: { print("Button at \(row)") }) {
                Text("Row: \(row) Name: A")
            }
            .buttonStyle(BorderlessButtonStyle())

            Button(action: { print("Button at \(row)") }) {
                Text("Row: \(row) Name: B")
            }
            .buttonStyle(PlainButtonStyle())
        }
    }
SwiftUI - Two buttons in a List
Set the button style to something different from the default, e.g., BorderlessButtonStyle()
struct Test: View {
  var body: some View {
    NavigationView {
      List {
        ForEach([
          "Line 1",
          "Line 2",
        ], id: \.self) {
          item in
          HStack {
            Text("\(item)")
            Spacer()
            Button(action: { print("\(item) 1")}) {
              Text("Button 1")
            }
            Button(action: { print("\(item) 2")}) {
              Text("Button 2")
            }
          }
        }
        .onDelete { _ in }
        .buttonStyle(BorderlessButtonStyle())
      }
      .navigationBarItems(trailing: EditButton())
    }
    .accentColor(.red)
  }
}
How do I keep multiple button actions separate in SwiftUI ForEach content?
This is default behaviour of List, it identifies Button in row and makes entire row active, use instead .onTapGesture as below
List {
      ForEach(tasks, id: \.self) { task in
            HStack {

                Image(systemName: task.isComplete ? "square.fill" : "square")
                .padding()
                .onTapGesture {
                    task.isComplete.toggle()
                    try? self.moc.save()
                    print("Done button tapped")
                }

                Text(task.name ?? "Unknown Task")
                Spacer()

                Image("timer")
                .onTapGesture {
                    print("timer button tapped")
                }
            }
        }
        .onDelete(perform: deleteTask)
    }
Buttons in SwiftUI List ForEach view trigger even when not tapped?
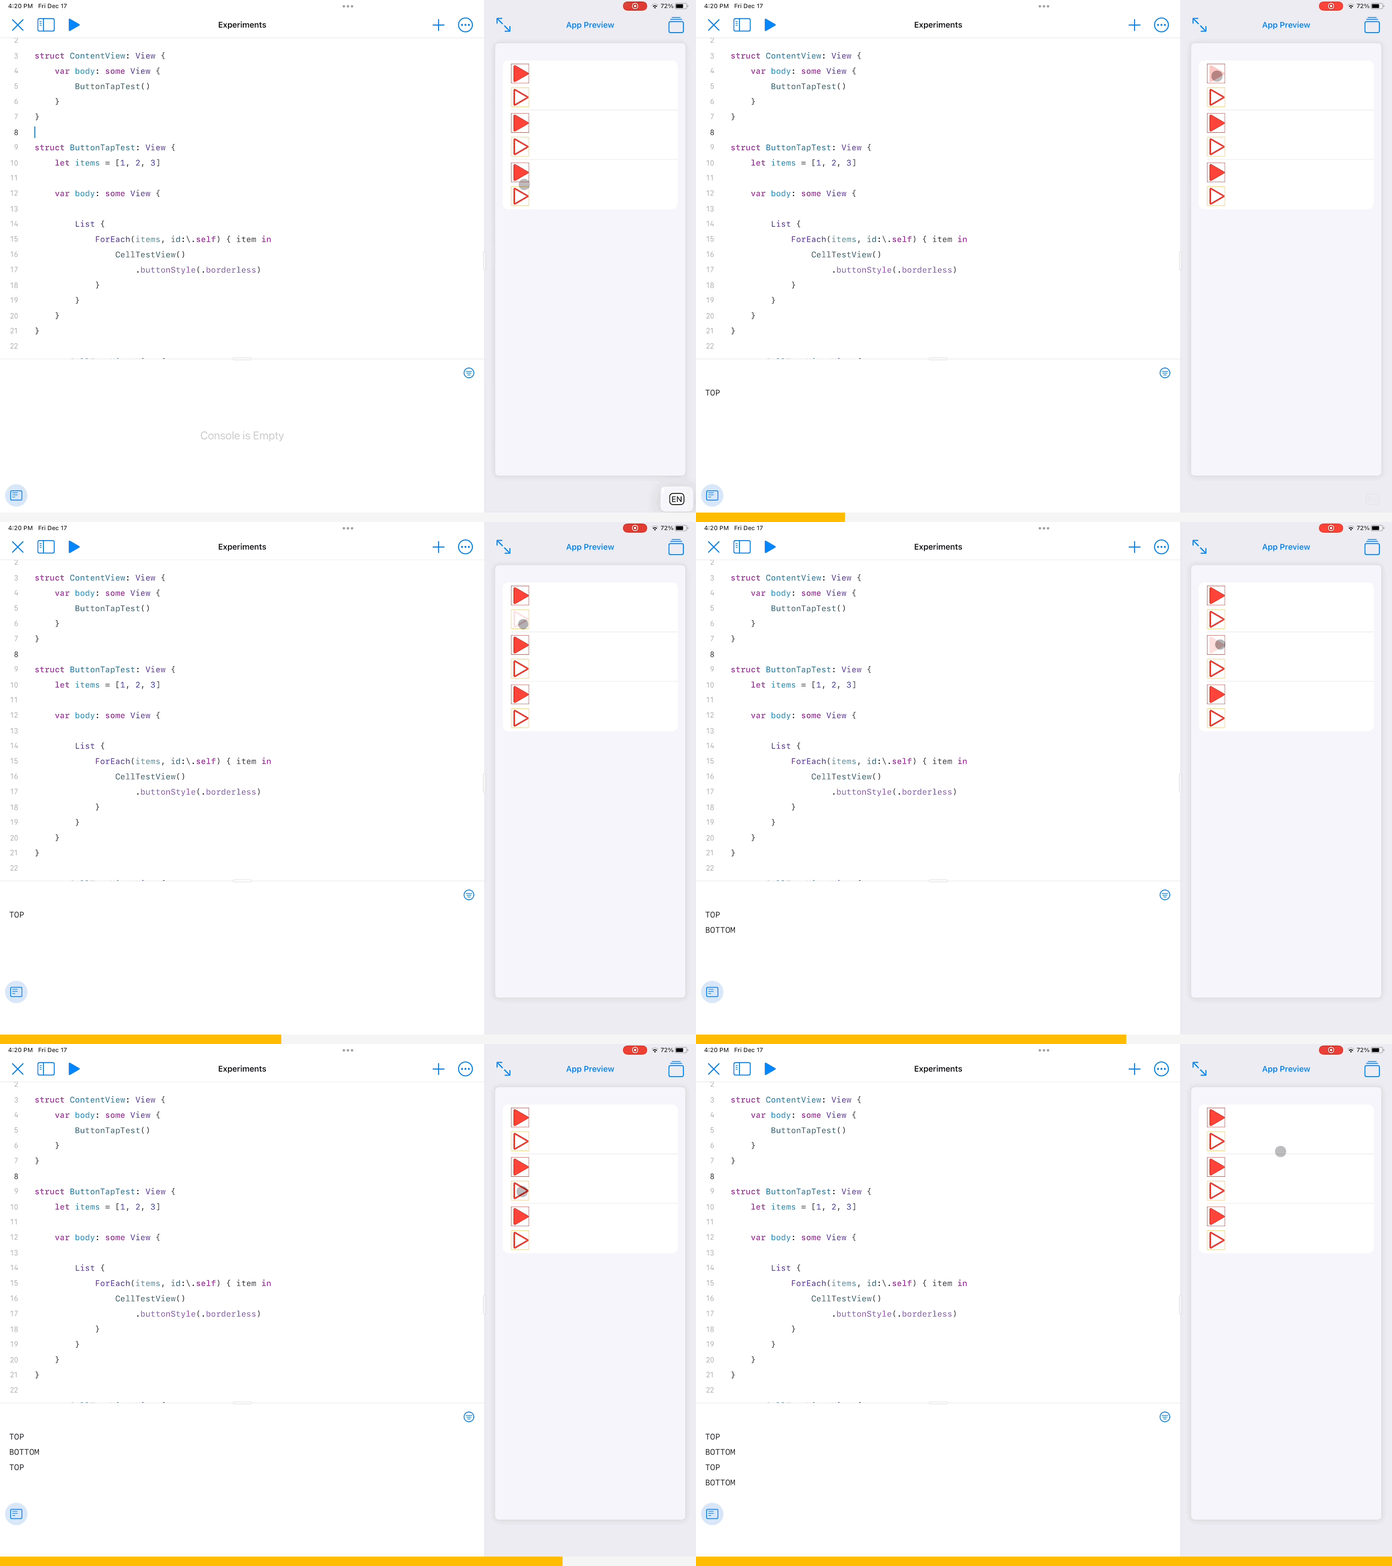
Whenever you have multiple buttons in a list row, you need to manually set the button style to .borderless or .plain. This is because buttons “adapt” to their context.
According to the documentation:
If you create a button inside a container, like a List, the style resolves to the recommended style for buttons inside that container for that specific platform.
So when your button is in a List, its tap target extends to fill the row and you get a highlight animation. SwiftUI isn’t smart enough to stop this side effect when you have more than 2 buttons, so you need to set buttonStyle manually.
CellTestView()
    .buttonStyle(.borderless)
Result:

SwiftUI - Add a row of multiple Textfields/Views on button click
Your AddButton action appends an item to skillList, but does not append an item to evalList. So when ListItem uses its skillEvaluation binding, the binding's getter tries to access an element of evalList that doesn't exist.
Try this:
AddButton {
    self.evalList.append("")
    self.skillList.append("")
}
How do I get an edit button for a row in a list/for each loop? [SwiftUI]
You need to display the button yourself.
First, ensure you have some @State var tracking whether Edit mode is toggled:
@State var editing: Bool = false
Then, in your body, show the circle button next to the NavigationLink if you are editing:
var body: some View {
    ZStack {
        List {
            ForEach(searchResults, id: \.self.id) { dir in
                Section(dir.title) {
                    ForEach(dir.getChildFolders(), id: \.self.id) { folder in
                        HStack {
                            NavigationLink(destination: DirectoryView(directory: folder)) {
                                Label(folder.title, systemImage: "folder")
                            }
                            if editing {
                                Spacer()
                                Button(action: {
                                    // Perform circle button action here
                                }) {
                                    Image(systemName: "ellipsis.circle")
                                }
                            }
                        }
                    }
                    .onDelete(perform: { offsets in
                        dir.items.remove(atOffsets: offsets)
                        updateView.update()
                    })
                    .onMove(perform: { source, destination in
                        dir.items.move(fromOffsets: source, toOffset: destination)
                        updateView.update()
                    })
                }
            }
        }
    }
}
Navigating to detail view on button click in List Row(TableviewCell) in SwiftUI
Use the
.hidden()modifier on thenavigationLinkto prevent the list item from capturing it's actionChange the
.buttonStylefromautomaticto something else on the list item to prevent it from capturing the button action. (for exampleborderless)
Working Demo
struct ContentView: View {
    @State var selectedTag: Int?

    var body: some View {
        NavigationView {
            List(1...10, id: \.self) { id in
                HStack {
                    Text("Item \(id: id)")
                    Spacer()

                    Button("Show detail") { selectedTag = id }
                    .background(link(id))
                }.buttonStyle(.borderless) /// ⚠️ on the item! **NOT** on the button!!!
            }
        }
    }

    func link(id: Int) -> some View {
        NavigationLink("",
            destination: Text("\(id) Selected"),
            tag: id,
            selection: $selectedTag
        ).hidden()
    }
}
Related Topics
Required Ipv6 Compatibility - iOS App Rejected by Apple
In iOS, How to Store a Secret "Key" That Will Allow Me to Communicate with My Server
How to Use Any in Codable Type
Uicollectionview: Must Be Initialized with a Non-Nil Layout Parameter
Detecting Collisions in Sprite Kit
How to Achieve a "Clock Wipe"/ Radial Wipe Effect in iOS
Scrollview Gesture Recognizer Eating All Touch Events
Capturing and Storing a Picture Taken with the Camera into a Local Database/Phonegap/Cordova/Ios
Uidatepicker Select Month and Year
Custom Init for Uiviewcontroller in Swift with Interface Setup in Storyboard
What Is "Self" Used for in Swift
Xcode Quits Unexpectedly Every Time I Open My Project
Detect First Launch of iOS App
Alternative to Dtsendsignalflag to Identify Key Events in Instruments
Where's the Difference Between Setobject:Forkey: and Setvalue:Forkey: in Nsmutabledictionary