How can I use a C++11 to program the Arduino?
As of version 1.6.6, the Arduino IDE enables C++11 by default.
For older versions, read on:
It is very easy to change the flags for any element of the toolchain, including the assembler, compiler, linker or archiver.
Tested on the Arduino IDE version 1.5.7 (released on July 2014),
- Locate the platform.txt file,
- AVR architecture => {install path}\hardware\arduino\avr\platform.txt
- SAM architecture => {install path}\hardware\arduino\sam\platform.txt
- Inside that file, you can change any flag, for instance,
- compiler.c.flags for changing the default compilation flags for C++ files.
- compiler.cpp.flags for changing the default compilation flags for C++ files.
- You can also change any of the "recipes" or compile patters, at the corresponding section of the configuration file, under the title "AVR/SAM compile patterns".
- After making the changes, you must restart the Arduino IDE, at least on version 1.5.7.
For instance,
To enable support for C++11 (C++0x), tested on Arduino IDE versions 1.5.7 and 1.5.8, you will simply add the flag "-std=gnu++11" at the end of the line starting with compiler.cpp.flags=".
It is expected that C++11 is enabled by default in the near future on the Arduino IDE. However, as of version 1.5.8 (Oct 2014) it is still not the case.
how to use standard c header files in arduino
You have to tell Arduino that your library uses C naming. You can use extern "C" directly in the Arduino code.
The next code compiles in Arduino IDE 1.05.
extern "C"{
  #include <mycLib.h>
}

void setup()
{
  mycLibInit(0);
}

void loop()
{
}
mycLib.h
#ifndef _MY_C_LIB_h
#define _MY_C_LIB_h

typedef struct {char data1;
                int data2;
                } sampleStruct;

  void mycLibInit(int importantParam);
  void mycLibDoStuff(char anotherParam);

  sampleStruct mycLibGetStuff();

#endif
mycLib.c:
#include "mycLib.h"
sampleStruct _sample;
void mycLibInit(int importantParam)
{
    //init stuff!
    //lets say _sample.data2 = importantParam
}

void mycLibDoStuff(char anotherParam)
{
    //do stuff!
    //lets say _sample.data1 = anotherParam
}

sampleStruct mycLibGetStuff()
{
    //return stuff,
    // lets say return _sample;
}
Lighting Control with the Arduino
An alternative (and safer than playing with triacs – trust me I've been shocked by one once and that's enough!) is to use X-10 home automation devices.
There is a PC (RS232) device (CM12U UK or CM11 US) you can get to control the others. You can also get lamp modules that fit between your lamp and the wall outlet which allows you to dim the lamp by sending signals over the mains and switch modules which switch loads on and off.
The Arduino has a TTL level RS232 connector (it's basically what the USB connection uses) – Pins 0 and 1 on the Diecimila so you could use that, connect it via a level converter which you can buy or make and connect to the X-10 controller, theirs instructions on the on the Arduino website for making a RS232 port.
Alternatively you could use something like the FireCracker for X-10 which uses 310MHz (US) or 433MHz (UK) and have your Arduino send out RF signals which the TM12U converts into proper X-10 mains signals for the dimmers etc.
In the US the X-10 modules are really cheep as well (sadly not the case in the UK).
Arduino: cannot pass union struct as pointer ac I can with gcc compiler
You have several unnamed items. This happens with typedefs. You could try,
union sig_union
{
    struct
    {
        unsigned unit   :2;
        unsigned channel:2;
        unsigned status :1;
        unsigned group  :1;
        unsigned remote :26;
    } d;                       /* Note the name here. */
    unsigned long data;
} signal;
typedef union sig_union Signal;
Then in your code you need,
void testPassingStruct(Signal *variable)
{
    variable->d.status = 1;
}
You can also use defines for masks and bit fields. Often it makes control of what bit is where clearer and the compiler will generate similar code in both cases. For instance,
#define SIG_UNIT(d)    (d&0x3)
#define SIG_CHANNEL(d) (d&0xc>>2)
#define SIG_STATUS(d)  (d&0x10)
/* etc. */
Especially with system programming where the bits matter, this is better as I don't believe that the 'C' bit fields specify how they are placed. Most of all, I am sure it will compile.
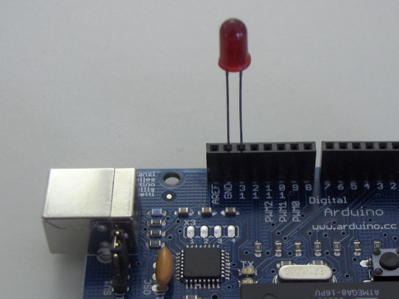
Steps to make a LED blink from a C/C++ program?
Here's a tutorial on doing it with a parallel port.
Though I would recommend an Arduino which can be purchased very cheaply and would only involve the following code:
/* Blinking LED
 * ------------
 *
 * turns on and off a light emitting diode(LED) connected to a digital
 * pin, in intervals of 2 seconds. Ideally we use pin 13 on the Arduino
 * board because it has a resistor attached to it, needing only an LED

 *
 * Created 1 June 2005
 * copyleft 2005 DojoDave <http://www.0j0.org>
 * http://arduino.berlios.de
 *
 * based on an orginal by H. Barragan for the Wiring i/o board
 */

int ledPin = 13;                 // LED connected to digital pin 13

void setup()
{
  pinMode(ledPin, OUTPUT);      // sets the digital pin as output
}

void loop()
{
  digitalWrite(ledPin, HIGH);   // sets the LED on
  delay(1000);                  // waits for a second
  digitalWrite(ledPin, LOW);    // sets the LED off
  delay(1000);                  // waits for a second
}
http://www.arduino.cc/en/Tutorial/BlinkingLED
Related Topics
How to Use Makefiles in Visual Studio
How to Use Clang++ with -Std=C++11 -Weverything -Werror
Vector: Initialization or Reserve
Integrate Type Name in Static_Assert Output
What Is Void* and to What Variables/Objects It Can Point To
This Declaration Has No Storage Class or Type Specifier in C++
How to Asynchronously Copy Memory from the Host to the Device Using Thrust and Cuda Streams
Bytewise Reading of Memory: "Signed Char *" VS "Unsigned Char *"
How to Set Application Icon in a Qt-Based Project
Stl Map Should Use Find() or [N] Identifier to Find Element in Map
How to Choose Heap Allocation VS. Stack Allocation in C++
Difference Between Global Non-Throwing ::Operator New and Std::Malloc
C++ Array of Pointers: Delete or Delete []
What Is Allowed in a Constexpr Function
Concatenate Compile-Time Strings in a Template at Compile Time